I've tried to be thorough in my instructions at the same time trying not to make this too photo heavy.
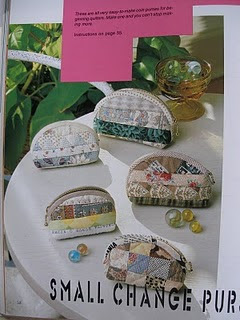
These purses finish at around 8" wide by 4 1/2" tall. I made two at the same time so the pictures may show either one.
First make a template out of cardboard by drawing two 8" circles that overlap in the middle. Circumference is 4" of course. Draw a line on each side to connect them and cut out.
You can make the one with the squares by cutting 24 x 2 1/2" squares and sewing them together in rows of four.
Cut a lining fabric and batting the same size, sandwich and quilt however you desire.
Place the template on top , draw around and cut out. For the one with squares, I centered the template using the seams as a guide.
Place pins at the half way mark on the sides.
Cut two strips of fabric on the bias, 2" wide and long enough to go around from one halfway point to the other. Press in half and sew to the top of the bag, backstitching at the begining and end.
Hand sew the binding to the back just a thread width beyond the stitching.
Place a pin at the middle and 3" either side on both sides of the bag. I use an oversized zip at least 20" ( 51cm) long.
Pin one side of the zip to the bag from one pin to the other as in the photo. Hand sew the binding edge to the zip and repeat for the other side. You can click on these photos for close ups to see which way to orient the zip.
That doesn't look too hard for zipperphobics now does it?
For the side that has the tail end of the zip, fold the sides in to the middle, first holding the zip back out of the way, make sure the binding edges meet snuggly together all the way to where the zip is sewn on. Rule a line 1 1/2" fom the point.
Pin the the zip back in place and sew on the line, backstitching at the begining and end.
For the other side with the head end of the zip, first close the zip and then make sure the binding edges meet inside, pin, mark and sew as before.
Trim 1/4" beyond the stitching on both sides.
Cut two pieces of lining fabric, 3 3/4" x 2" for tabs to cover the raw seams. Fold in half on the long sides and sew to the cut ends, zipper side underneath and on the same line as the previous stitching.
Turn the bag right side out and stich the binding edges together up to where the zip has been stitched previously to the binding. Do the same on both sides.
The tabs are now ready to be folded over the raw edges inside, pinned and hand stitched down.
Add some bling or other hardware to the zip end to make opening and closing easier and you're done.
Please feel free to use this pattern for personal use and share this pattern with friends but it is not to be sold.
I recieved a lovely gracious email from Rannveig about my little purse tutorial being the same as hers. Click
here to see hers. It's purely coincidental as can happen and I applaud bloggers who keep an eye on these things.
Her one has the same shape and size and the zip is machine sewn in whereas mine is hand sewn. Her pattern is from a purse she had bought I think and mine came from a Japanese book but with changes made. I'll add a little note about this on the tutorial as soon as I have time. It's a very common purse and there are a lot of patterns out there the same or similar as we now realise.